 |
|
- Why? Just because it would be cool. Also it would be a really fun project that would take a few weeks to complete. I needed a good project.
- How? By finding all the parts online and using as many tools as possible. Also I have a few ammo cans lying around to use.
- Purpose? To be a fully functioning windows based computer with pretty good specs, fully contained in the ammo can, with wireless keyboard and mouse that can stow inside the can and 802.11g wireless networking.
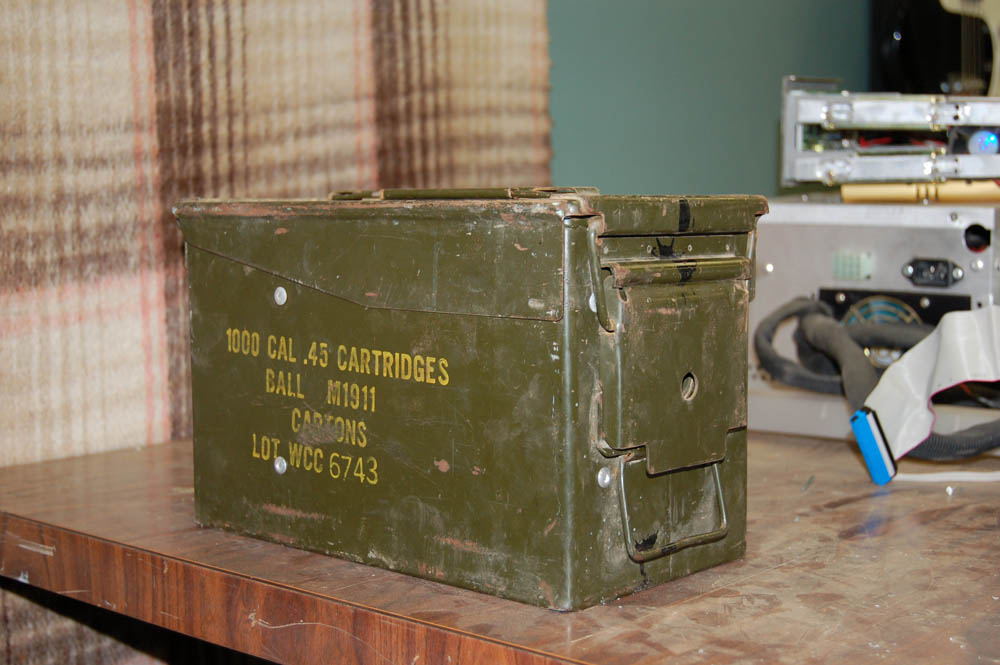 |
The CanSo I wanted this computer to look pretty rustic and authintic so I didn’t bother finding a new or clean ammo container. I decided to go with this one because of the sweet yellow label on the side. Also it was beat-up looking but it wasn’t dented or damaged otherwise. Measuring out the inside showed that it was exactly the right size for a Mini-ITX 170mmx170mm motherboard to be mounted across one of the sides. Perfect!
|
|
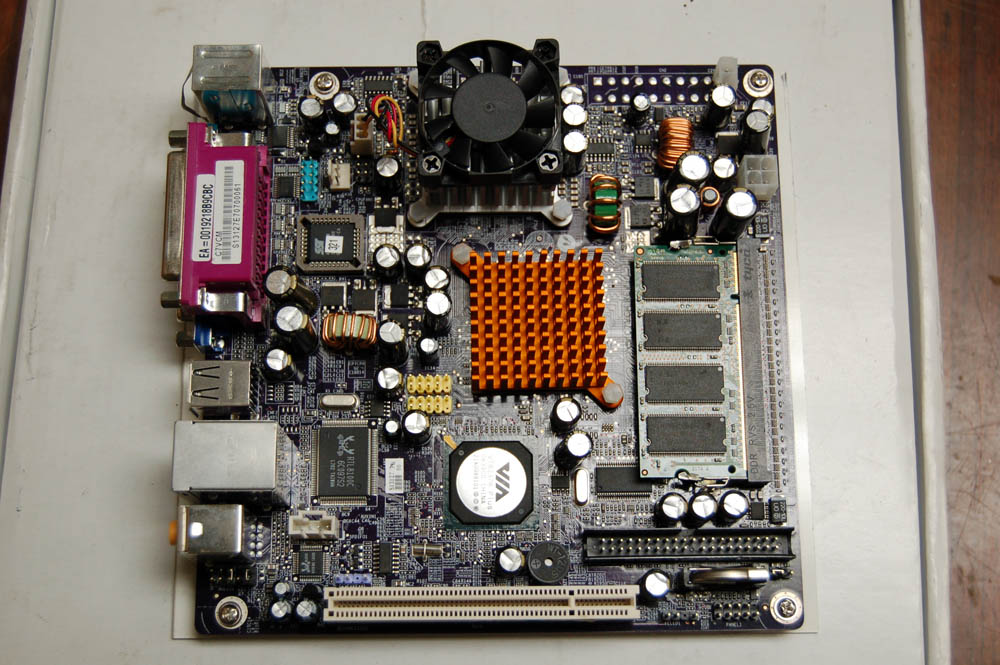 |
The BrainHere is a shot of the motherboard I purchased from mini-box.com. I highly recommend them for any tiny computer projects. This is a VIA based board with a 1.7ghz permanent processor, a SO-DIMM DDR slot, and all the rear connections you could ask for. Also notice there is no ATX header, this board has an onboard power supply and only requires one 12 volt line! Amazing for this application!
|
|
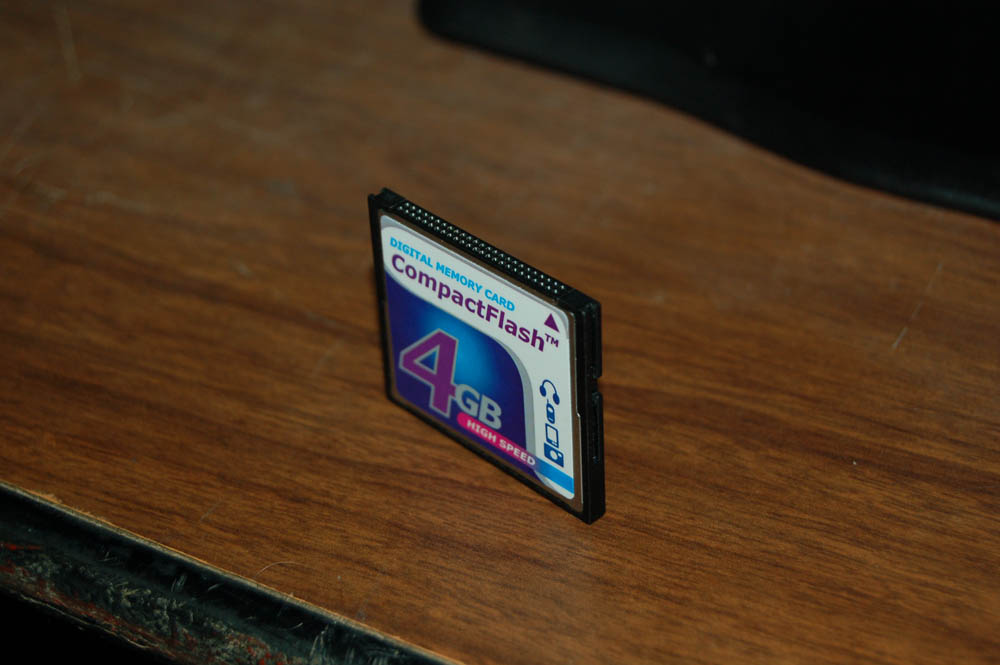 |
The StorageI wanted this to be a low power consumption computer, as well as durable and quiet. So I didn’t really want a hard drive spinning in there all the time. So I went with a 4gb compact flash card as the main hard drive. Super low power and produces no heat or sound. Only 4gb is going to be tight though…
|
|
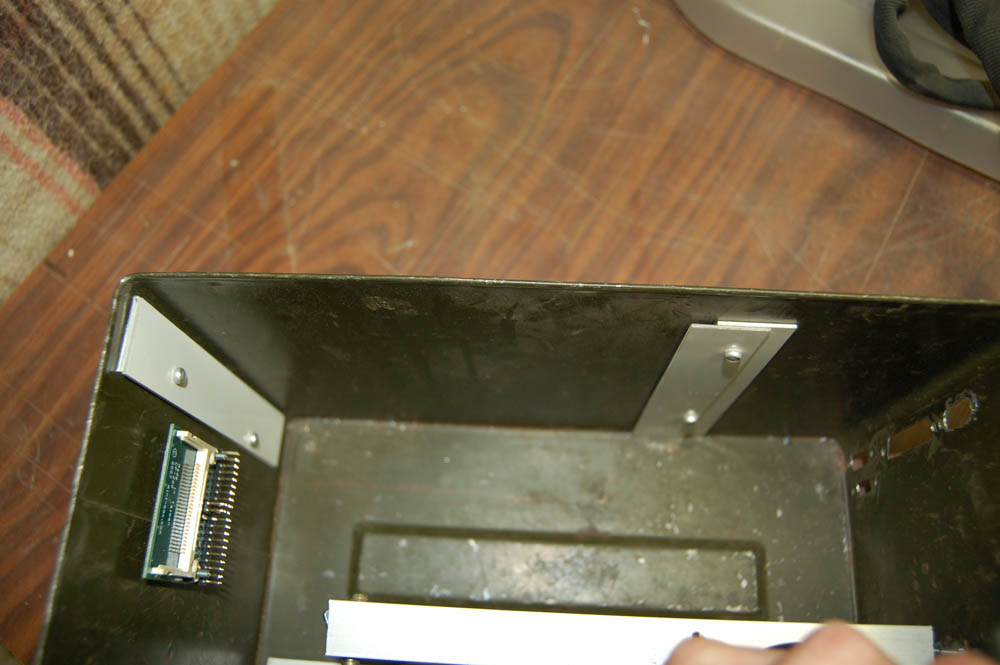 |
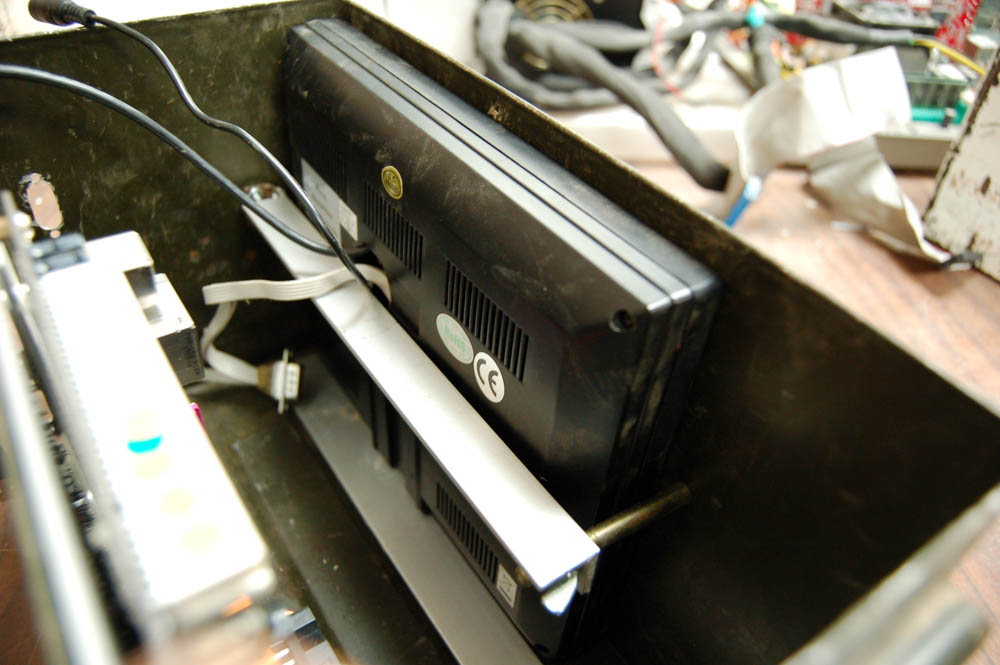
The MountingIt would take a very short screwdriver to bolt down the board in the constricted space. So I decided to create a rail system to allow the mobo to slide in and out easily. Here are the rails, also you can see the adapter the allows the use of the CF card as a hard drive, it’s attached to the left side.
|
|
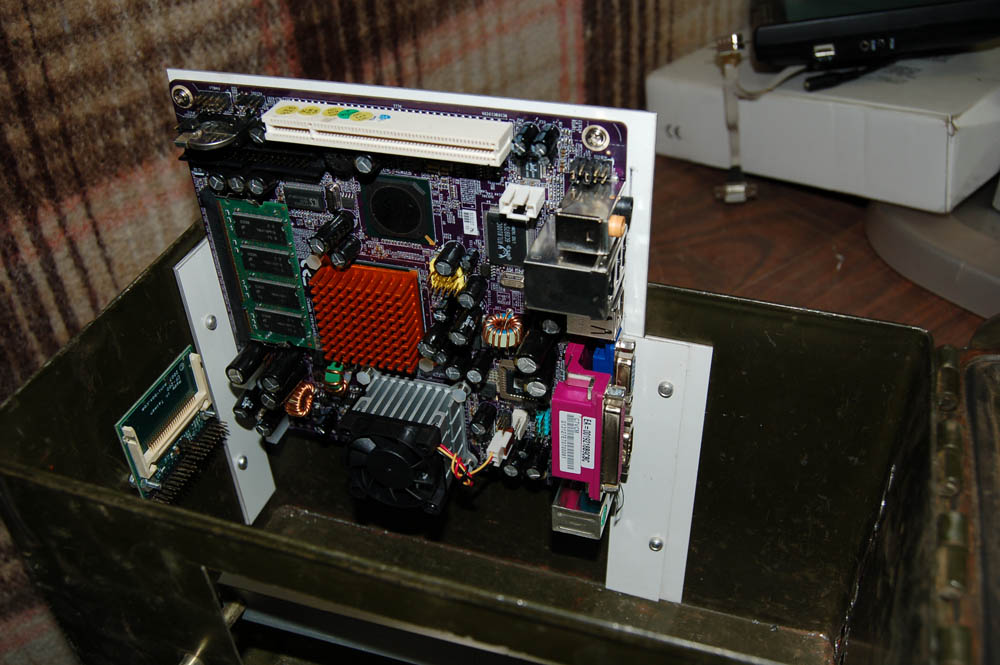 |
The SlideI attached the mobo to a piece of aluminum that is the same size as the mobo. Here it is sliding down. It fits snug enough to not need to be bolted or anything but it is easy to slide back out at any time. The lid of the can holds it in since it is the entire height of the inside. Nifty!
|
|
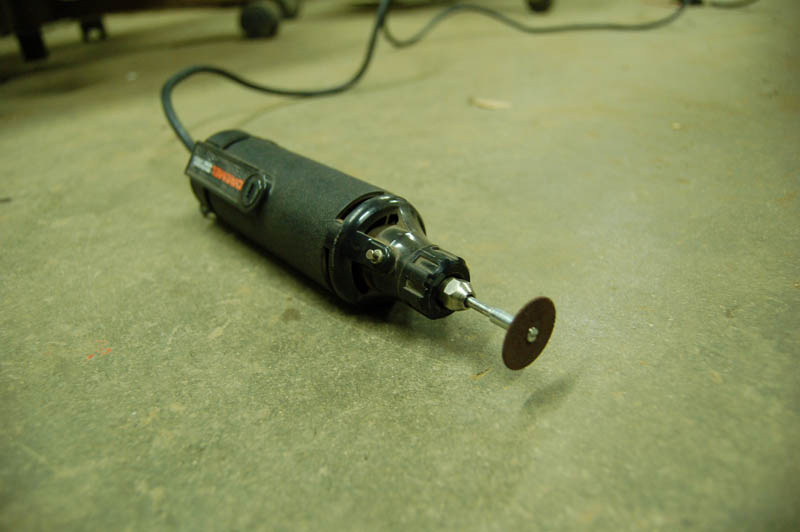 |
The ToolTime to cut some holes! I need a hole for buttons, for the monitor, and for the connections that will be on the back. This can is steel but it’s nothing the trusty Dremel Rotary Tool can’t handle. These little speed-cutting blades are perfect for this job.
|
|
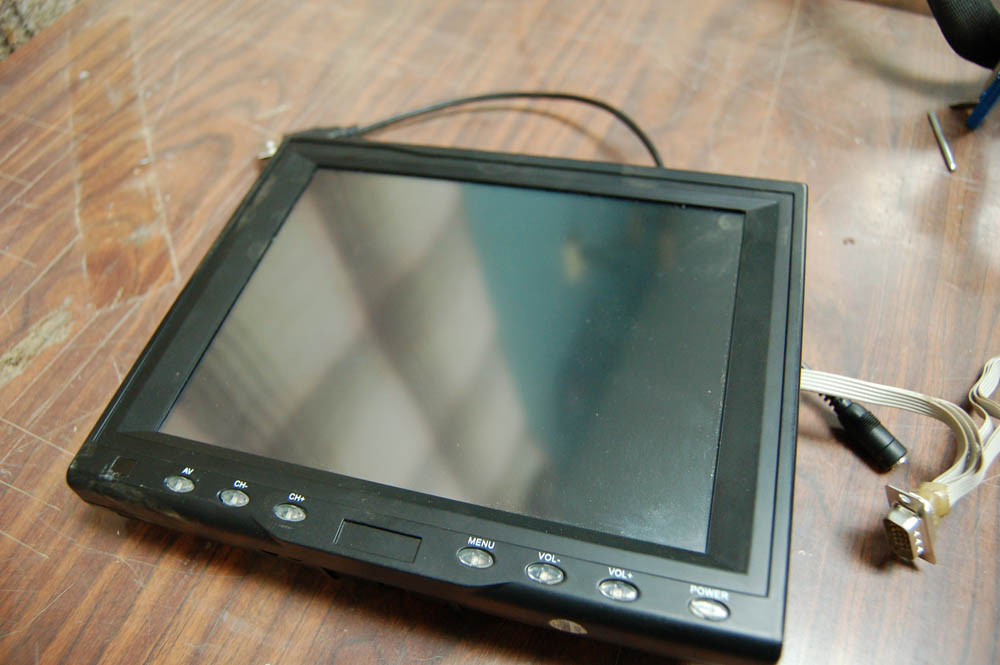 |
The ScreenI had to do a ton of research to find a good monitor for this beast. There are a ton of crappy small monitors out there that are pretty much worthless. This project required something that would work, look good, and take a beating. I ended up with this 8 inch VGA touch screen and I’m very happy. It is 800×600 while most of the cheap ones were much less. It was by far the most expensive purchase for this project though.
|
|
 |
Screen InHere is how the monitor is mounted inside the box. Since so far all the pieces are easily removed I designed the monitor mounting in a similar way. The brace across the back is hinged and allows for the screen to be removed very easily.
|
|
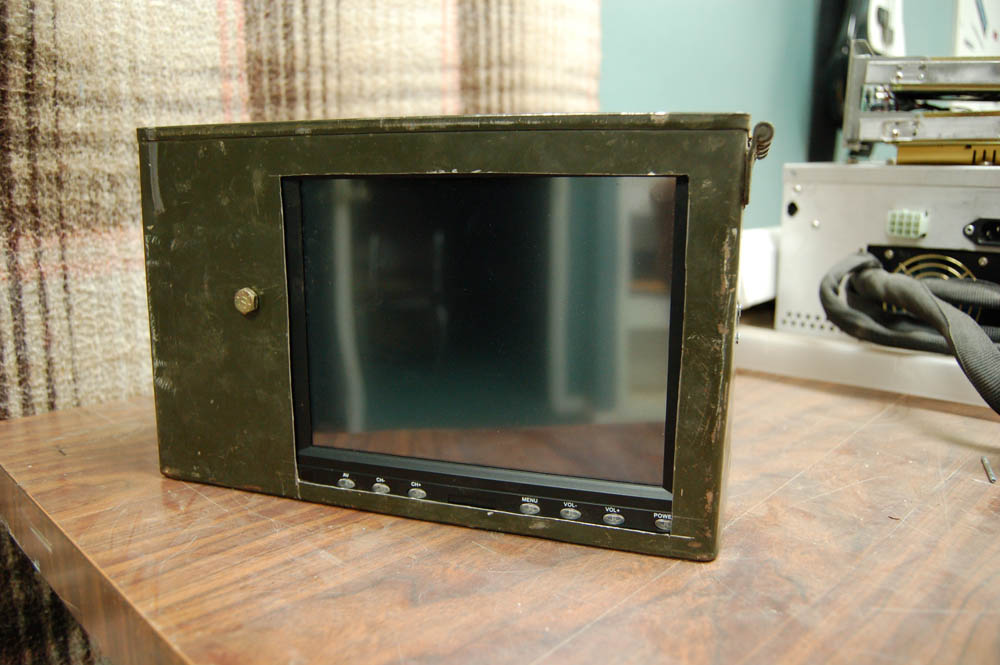 |
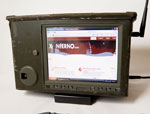
Yea?Here we go. Looks great right! Yea right, it looks aweful. That’s alright don’t worry about it!
|
|
 |
Lookin GoodWith a little spray paint carefully applied and some Dremel touch up on the frame, now it’s really looking good. Look’s like it was made to be right in there. Now all that’s left is a lot of wiring and some final things like airflow.
|
|
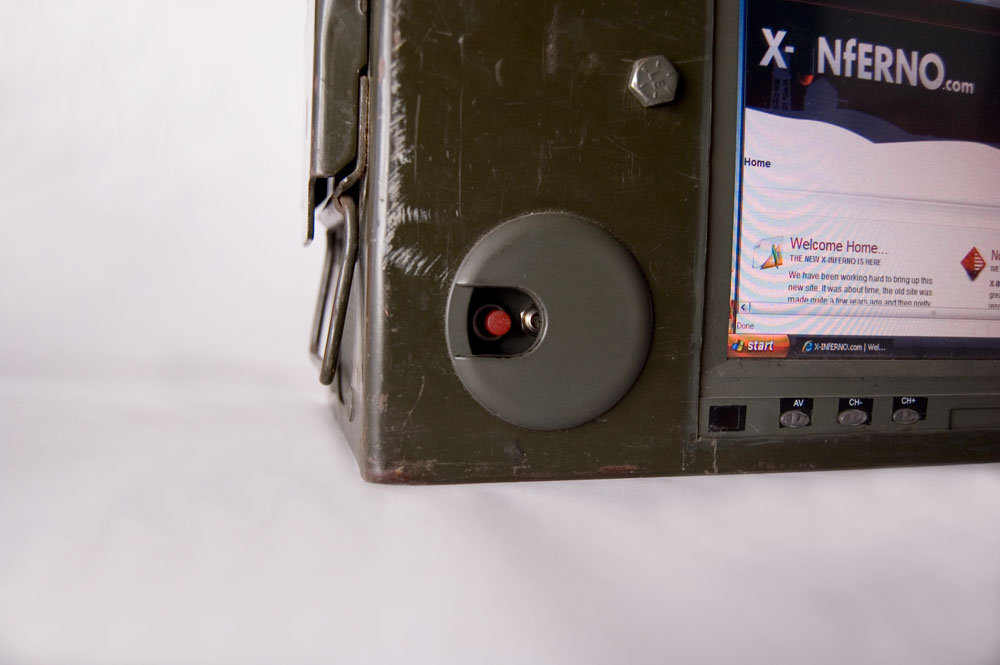 |
The ButtonsDefinitely need a way to turn this beast on and off. I made this out of a desk grommet, the kind you feed cables through. It has an awesome cap that covers all but one button. Or I can pop it off to access more functions.
|
|
 |
The GutsHere is a view of the internals. We’ve got the mobo, monitor, CF drive, wireless mouse adapter, bluetooth adapter, 802.11 b/g adapter, cooling system, and a ton of wires up in there. Still plenty of space to store the keyboard and mouse while on the go!
|
|
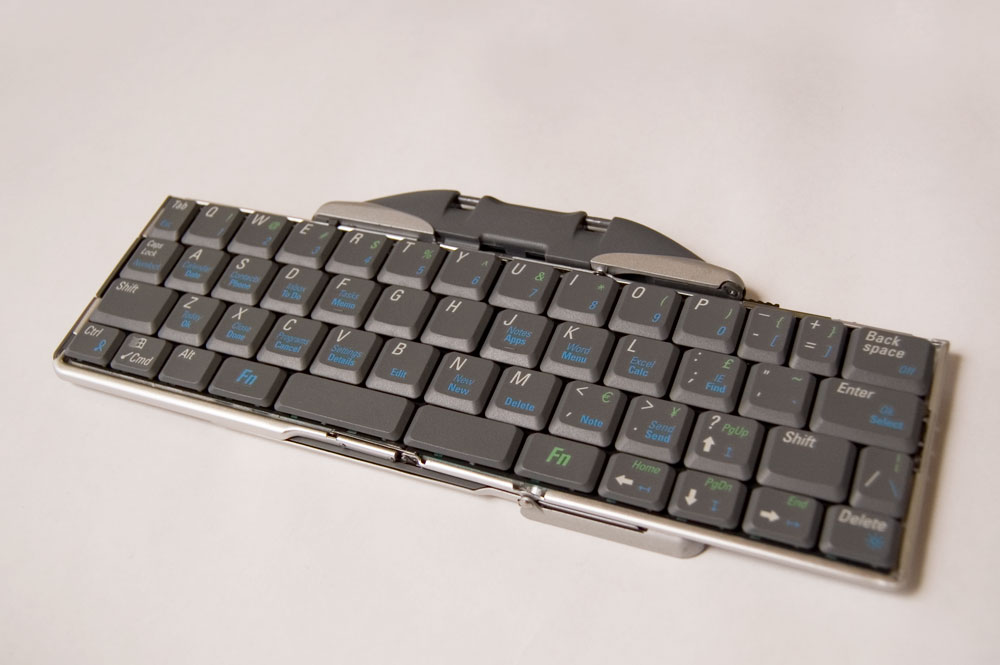 |
The KeyboardFor this project I found the coolest small keyboard possible. This baby folds up into a tiny package but unfolds into a really nice keyboard. Best part, it’s bluetooth, no wires and it works all the way across a big room, even through the metal casing of the can.
|
|
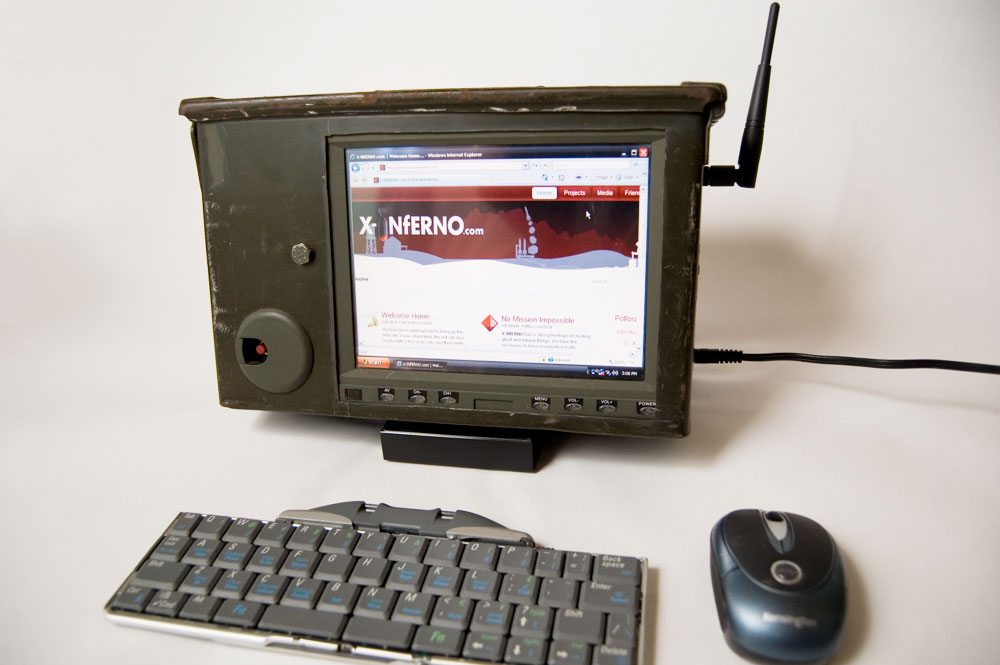 |
The AmmocanAfter a bunch of work and waiting for lots of shipments from newegg and other places, here it is. The X-INfERNO.com Ammo Can. Complete with wireless mouse and keyboard that stow away inside the can when not in use. It’s rugged, low power, and gets a lot of attention. Rockin!
|
So that’s the X-INfERNO Ammo-Can Computer. In a case that originally contained one thousand .50mm 1911 pistol rounds is now a fairly capable low power computer. It’s heavy and bulky compaired to today’s netbooks but hey, it has a handle and I made it all myself. Building this thing was more fun than I can express here and I hope it inspires you to go do something. Hope you enjoyed this article Let me know what you think through a comment!